Broadcasting
A control room for your stage.
1Add your sound objects
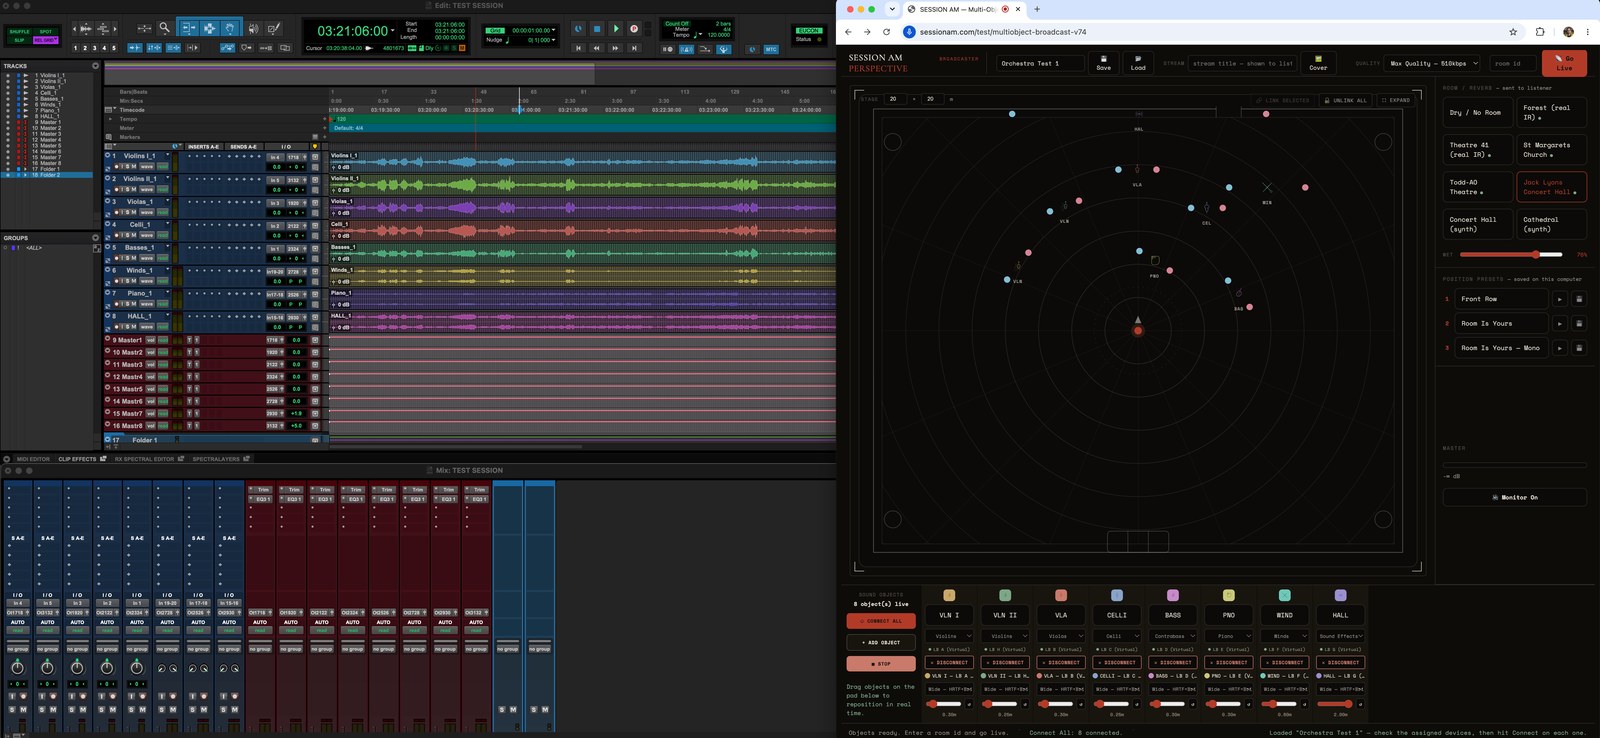
Every input — each mic, each channel from your audio interface — becomes one sound object. In the bottom rack:
- + Add Object creates a strip.
- On each strip: name it, pick an instrument icon (that's what listeners see on their map), choose the input device, set gain, and hit Connect. Mute and disconnect are per-strip.
- Connect All powers up every strip at once.
2Route your DAW — virtual audio devices
The broadcaster's inputs are your system's audio input devices. To stream separate stems from a DAW instead of live microphones, use a virtual audio driver: Loopback (Rogue Amoeba, macOS), or alternatives like BlackHole (macOS, free) or VB-Audio Cable (Windows).
- In Loopback, create one device per stem — name them predictably (LB A, LB B, LB C…) — each with its Pass-Thru source wired to Channels 1 & 2.
- In your DAW, give each stem or bus its own output, routed to the matching virtual device.
- In the broadcaster, each strip picks its own virtual device as input.
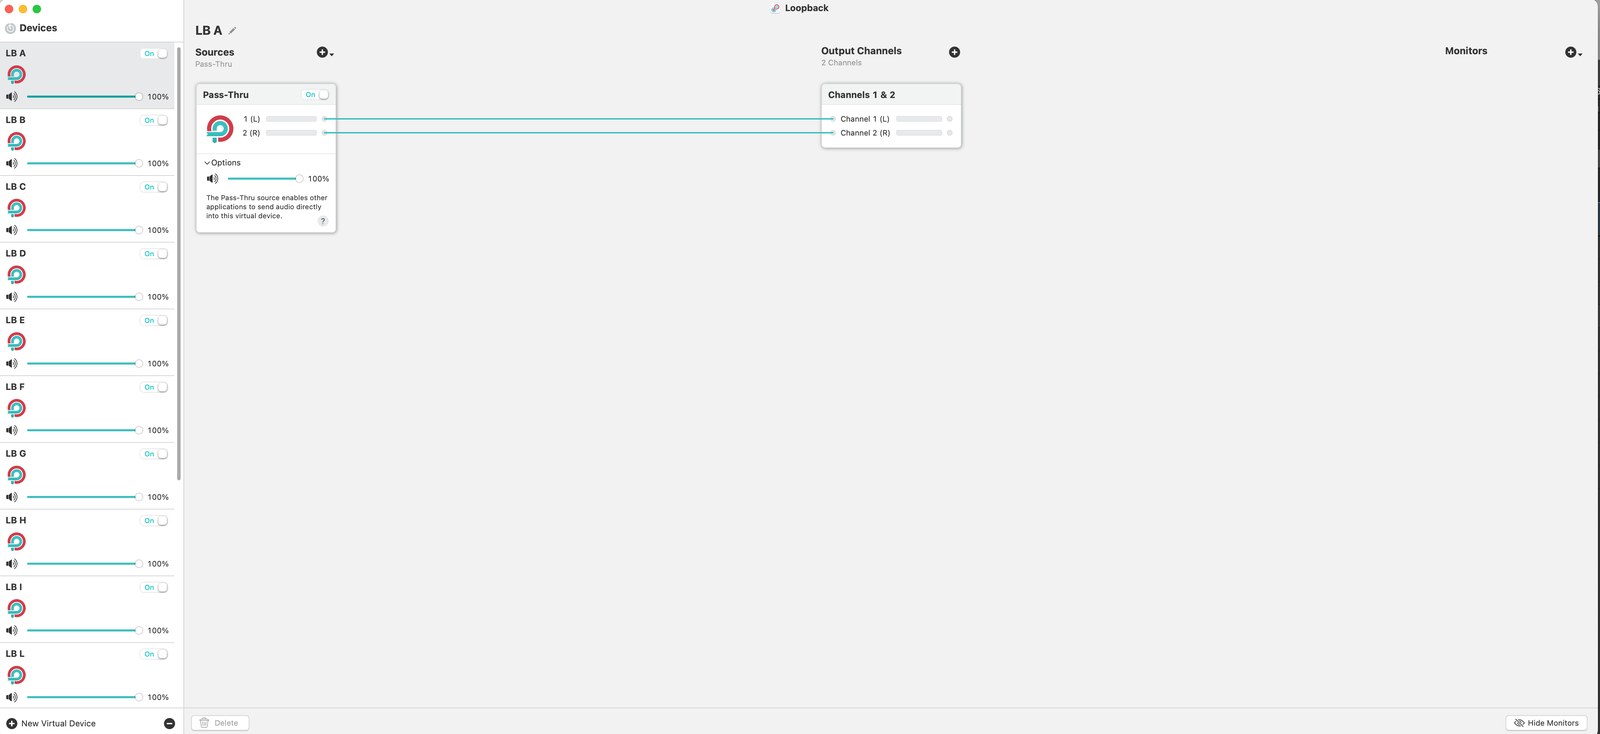
Why one device per object, instead of a single big multichannel device: each strip captures its device independently — a clean 1:1 mapping from DAW output → virtual device → object, with per-object gain and mute, and disconnecting one object never touches another.
Mono vs stereo. Each object captures up to 2 channels. A mono stem is the natural fit — a sound object is a point in space. A stereo stem works too: the strip shows a width mode — Mono sum (default, the safest spatial choice) or the Wide modes with a width slider, which spread the L/R image around the object's position.
Once everything is mapped, save the project: device assignments are stored in the project file, so next session the whole routing comes back in one click.
3Place them on stage
The big viewport is your stage, seen from above.
- Drag objects where you want them.
- Stage size (top-left) sets the real dimensions in meters — a 30×10 jazz club and a 60×40 field are very different walks.
- Link objects: Shift+click two or more, then Link Selected — they move together (a drum kit, a string section). Unlink All clears every link.
- Expand fullscreens the stage view.
4Position presets
Three preset slots in the right rail: arrange the stage, hit 💾 to save, ▶ to recall, and rename them freely. They're stored on this computer — instant scene changes mid-session.
5Room / Reverb
Pick the acoustic space you suggest to listeners — they see a banner and can accept it or choose their own. The Wet slider sets the suggested default amount.
6Stream identity
In the top bar, set the Stream title and upload a Cover image. This is what listeners see on the entry gate while joining — it's your poster.
7Quality
Two Opus rates: Max Quality — 510 kbps (default) or Balanced — 192 kbps for fragile connections.
8Go live
Enter a room id (this names your session) and hit 📡 Go Live. The listener link appears — Copy, WhatsApp, or Telegram it out. ■ Stop Live ends the broadcast.
9Monitor & meters
The Master meter shows your outgoing sum; Monitor On/Off toggles your own local listening without affecting the stream.
10Save / Load project
💾 Save writes a project file with device assignments, positions, room and quality; 📂 Load restores it. Name the project in the top-left field — one session's setup becomes next week's starting point.